Monday, March 30, 2015

Something Quickly: Why capacitor hour ratings don't matter

The high K capacitors most vendors keep screaming about is just a cash grab. Caps get rated at 105C° life time degrades exponentially with temperatures so if you get 2500 hours at 105C° you'll have a lifespan of 20,000 or more hours at 80C and 60,000 hours at 50C. Just look at all the reference R9 GPUs that got used for mining. None of them have capacitor issues and none of them have caps rated above 5K. So the 10K and 12K caps on motherboards are complete cash grabs. What does matter with caps is the capacity. The more and the bigger caps the VRM has the less noisy the power coming out of it is.

This will be new content that I will post intermittently. It will not replace the regular weekend posts I do so don't worry those will be as inconsistent as ever.
Also don't forget to checkout Silicon Lottery. They sell prebinned CPUs. So if you want you can go and just buy a 5Ghz 4790K from them. No need to worry about getting a bad chips.

Saturday, March 28, 2015

Noiseblocker NB-eLoop B12-4 Review


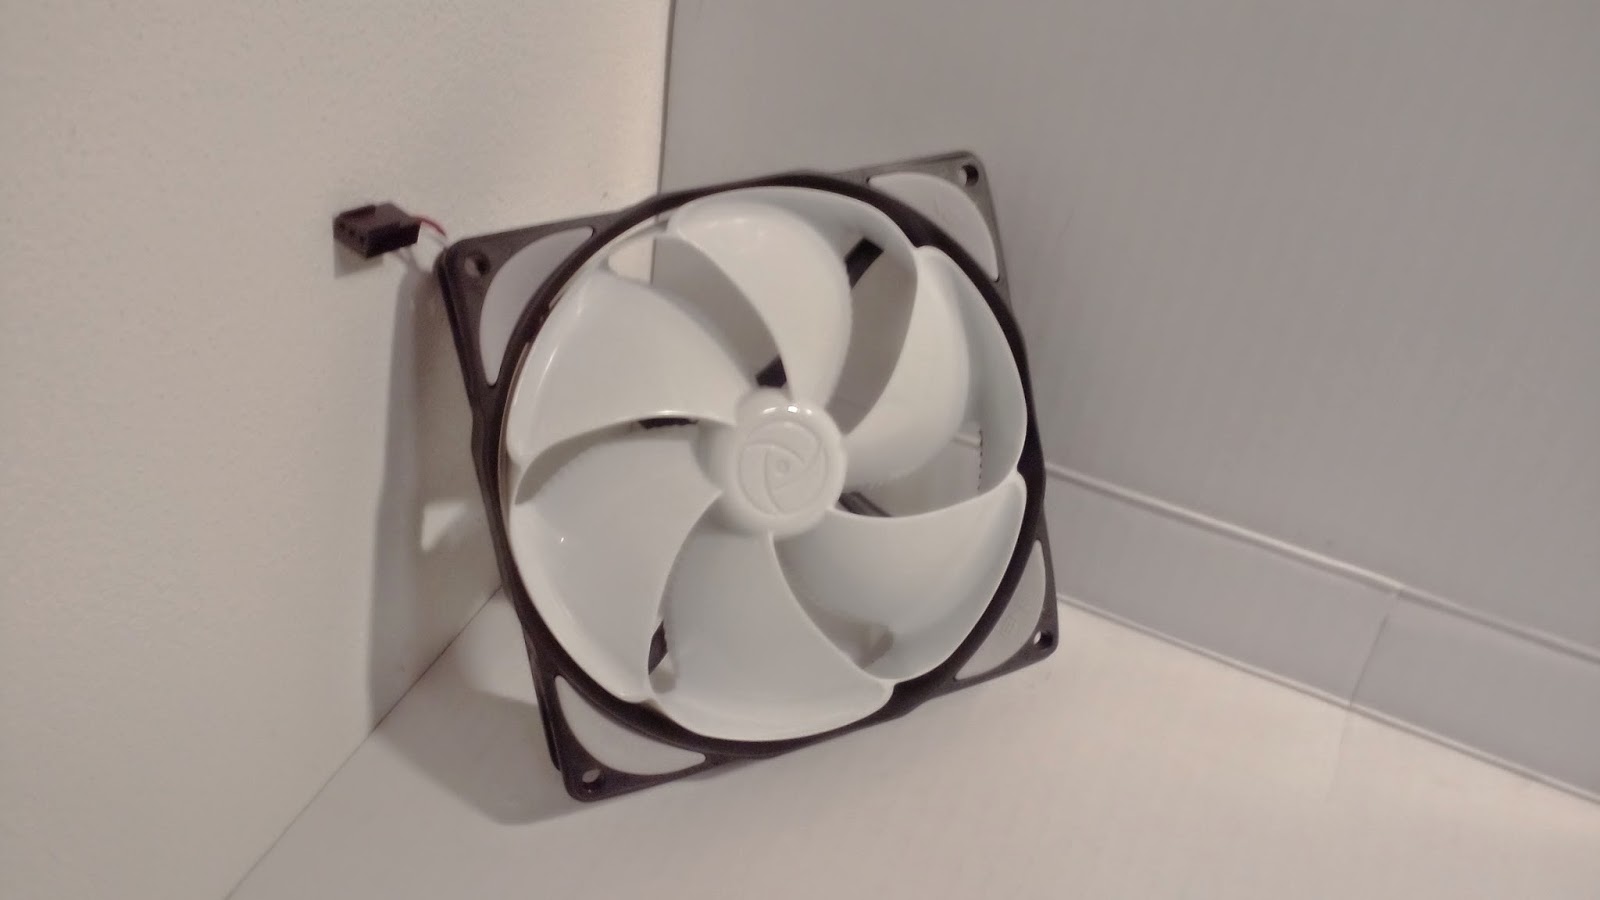
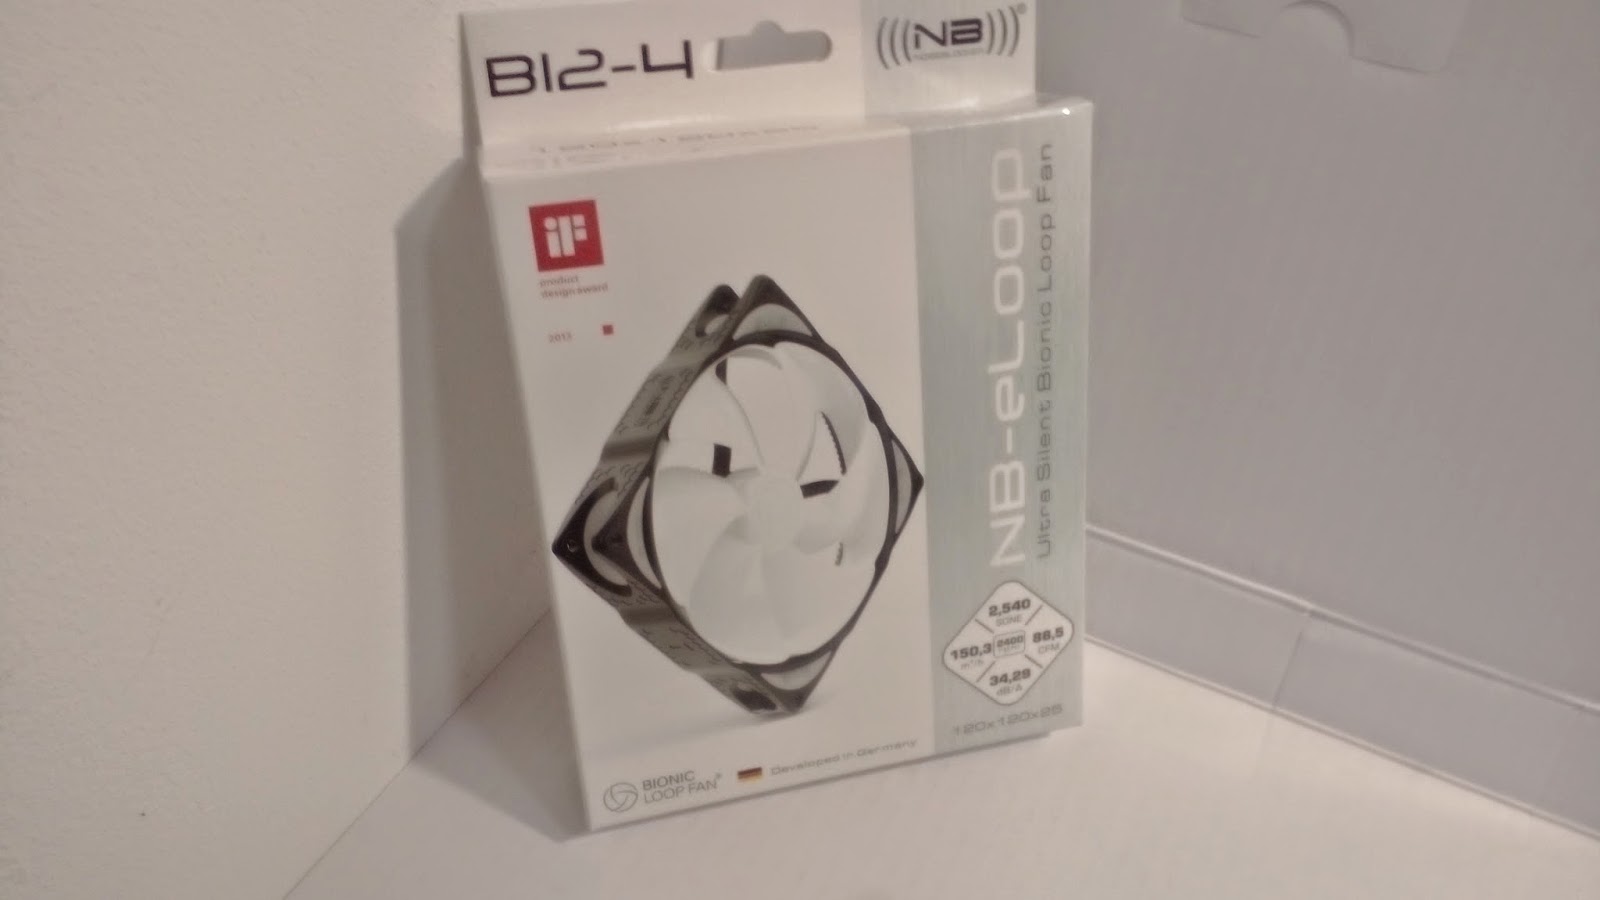
The accessories are some mounting screws and extension cables.


The testing setup
For testing the fans I'm using the RAM and fan test bench form this post. For temperature testing I run IBT and measure temperatures using AMD overdrive. I do the noise testing a room with ambient noise of 25dB. I first run the fan on it's own stading on a matress and then mounted to a H100 radiator. To measure the noise level I'm using the Sound Meter app on my Gsmart Mika M2 placed about 15cm away(otherwise I get no noise pickup).
These are the CPU power settings:
Clock = 4.5Ghz
VCC = 1.525 High LLC
VNB = 1.2 medium LLC
ALL TEST ARE CONDUCTED WITH THE FAN AT FULL SPEED

Fan Specs
Dimensions: 120 x 120 x 25 mm

RPM: 2400
Power Draw: 0.32A @ 12V
Performance
Noise level(lower is better): 53dB
Noise level radiator(lower is better): 51dB
CPU thermal margin IBT load(higher is better): 16.62C° (ambient 25-27C°)

As you probably noticed I have upgraded my testing procedure. This change is getting applied to the older reviews as well and is in the main fan review database.
Also please take some time and checkout my sponsor Silicon Lottery. They sell prebinned i7 CPUs. Meaning that you can buy a chip from them knowing how high it will overclock. No more getting chips that don't OC properly.

Thursday, March 26, 2015

I have a sponsor. Thank you Silicon Lottery

Silicon Lottery is a small American company that bins CPUs. Right now they only bin Intel CPUs. Basically this means if you're looking for a high quality CPU like a 5Ghz 1.325V 4790K or 4.7Ghz 5820K or 5960X you can just buy them. No more hoping that you get a good CPU only to get a chip that needs 1.35V for 4.5Ghz. They have great prices for everything except the unicorn like CPUs so I really recommend you check them out. I know I will be buying all my intel chips from them from now on.

Here's a link to their site and if you click on the ad in the sidebar it will kick you straight to their product page.

Saturday, March 21, 2015

ASUS A88X-PRO review


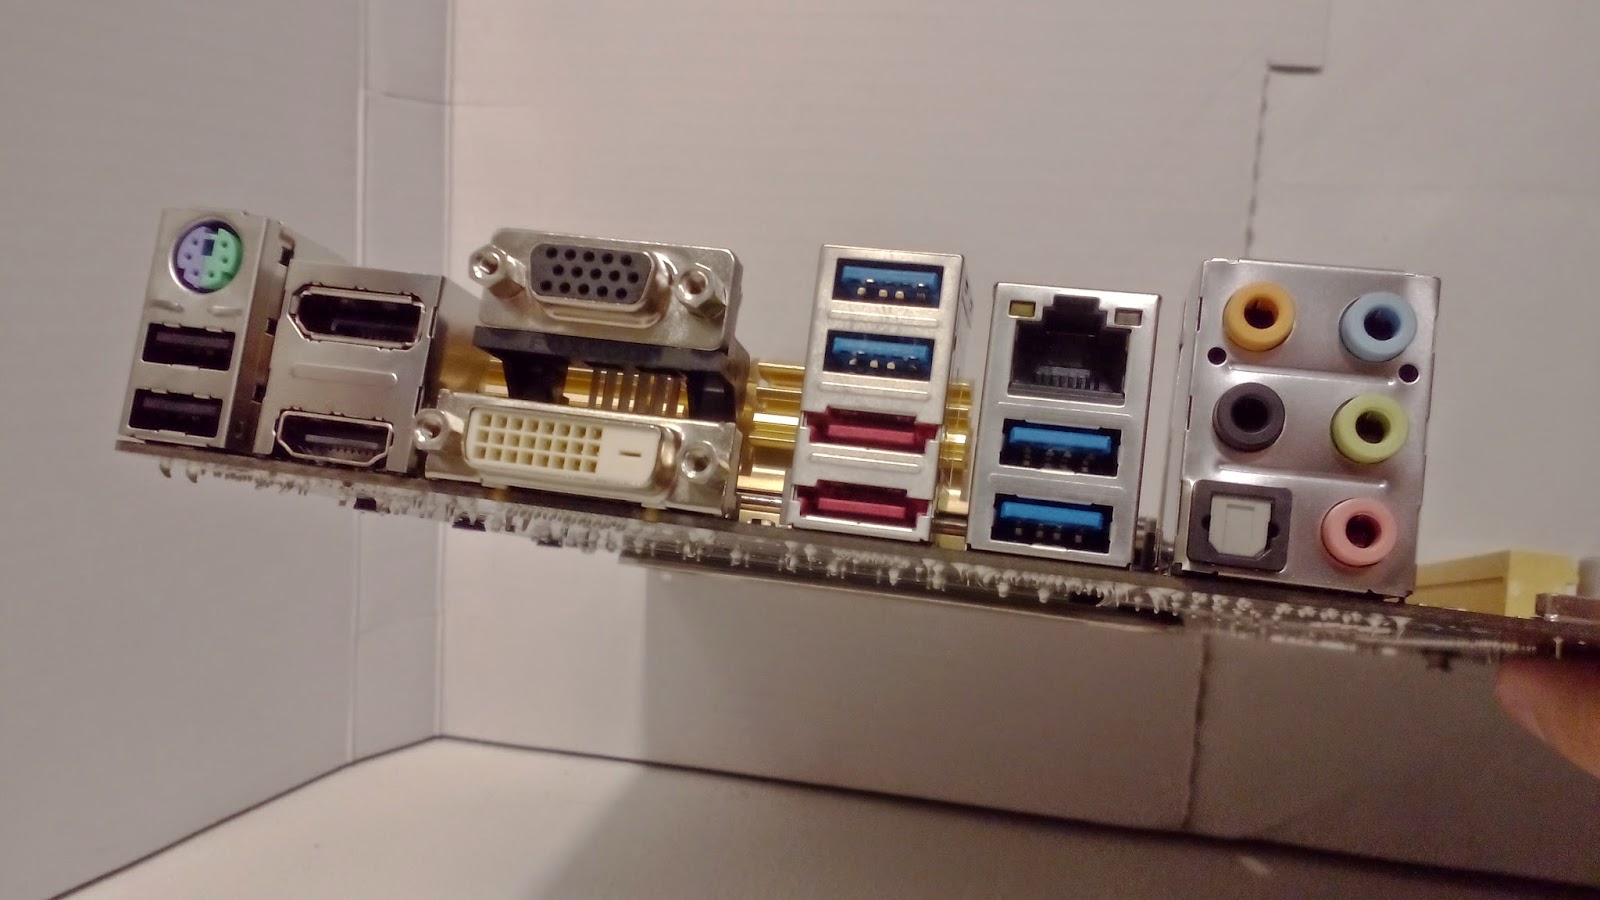
More USB 2.0 headers on the rear I/O would be welcome, as there isn’t any need for the VGA connector.


These are all the accessories that come with the board that you won't be throwing out. I'm a little disappointed that there are only 4 SATA cables instead of 6. This means the board does not come with enough SATA cables to feed all the SATA ports on the board itself. Considering the price of this motherboard, this is quite disappointing.


VRM
CPU Core
- 6 True Phases
- Low side made of 2 parallel 30V 69A NTMSF4C06N OnSemi MOSFETs with TMax of 150C°
- High side made of 1 30V 52A NTMSF4C09N OnSemi MOSFET with TMax of 150C°
- 680nH Inductors
- Gold heatsink that cools the VRM, including a heat pipe that travels from the VRM to the SB
- 200Hz to 400KHz
CPU NB + iGPU
- 2 True Phases
- Low side made of 2 parallel 30V 69A NTMSF4C06N OnSemi MOSFETs with TMax of 150C°
- High side made of 2 parallel 30V 52A NTMSF4C09N OnSemi MOSFETs with TMax of 150C°
- 680nH inductors
- Heatsink + Heatpipe traveling from the VRM to the SB
- 200 to 400KHz
RAM
- 2 True Phases
- Low side made of 1 30V 52A NTMSF4C09N OnSemi MOSFET with TMax of 150C°
- High side made of 1 30V 52A NTMSF4C09N OnSemi MOSFET with TMax of 150C°
- No heatsink
- 300Hz to 500KHz
Verdict: 9/10
To receive a 10/10, this board should have included an 8 phase design on the VRM with a higher switching frequency. This doesn't really matter in this board’s case as it performs adequately, but regardless there’s room for improvement.


BIOS
Voltages
- Max VCC: 1.9V ~2V on extreme LLC
- Max VNB: 1.75V
- Max VDDR: 2.135V  
- Includes VREF for NB and RAM
CPU:
- Custom BCLK clockgen for 90 to 300Mhz BCLK
- NB clock from 400 to 6300
- Single core, single module, and single core per module mode
DRAM
- XMP Support
- All timings available
- No support for asymmetrical timings
Extras
- Support for running 4 SATA ports in IDE and 4 in AHCI simultaneously
- Control over individual USB ports being enabled
- Individual fan control for every fan header
- Excellent mouse support
- Fast boot with manual choice of device initialization
- Ability to save up to 8 OC profiles
- SPD reader
- EZ Flash 2 allows to flash BIOS without having a CPU installed
- Favorites tab to store your most frequently used functions
Verdict: 9/10
Great NB clock control, an awesome clockgen for the BCLK and all the right voltages with all the right limits (VCC could have been a little higher but LLC fixes that). I was glad to see that this board includes fully featured core control. This board so far has the best BIOS I have used. Unfortunately, it does not have a backup chip and corrupts much more easily than most other BIOSes I've used.Thankfully, a BIOS update fixed this issue. This board is close to perfect, but not a 10.


Testing Results
The following settings passed  Intel Burn Test (IBT).
- ECO 2x2GB 9-12-11-28 1.837V/1.35V max clock: 2282Mhz
The system booted the following settings
- Max CPU clock 1.781V 4core: 4949Mhz
- Max NB clock 1.35V: 2600Mhz
- Max BCLK clock: 134Mhz


Verdict: 6/10
This board is inconsistent, and struggles to handle RAM. This is not the same way that the A85X Extreme6 couldn't handle certain things. The A88X-PRO just can't set subtimings. Even the default DOCP overclocking XMP profiles will not run properly. This made me wonder if my RAM was at fault, I tried my 4gb Vengeance memory and so far have come to the conclusion that the board is at fault here. If you are new to overclocking RAM, steer clear of this board, as RAM tuning on this board is a massive pain. When this board fails on a setting, it fails hard and it takes a long time to reset the changes that you’ve made.


Conclusion: 24/30, 0.192pts/$
The board needs a BIOS that plays better with old RAM. I would also appreciate a BIOS clear button instead of the jumper, since it is inconvenient. The MemOK! button also doesn’t always clear the BIOS enough to get the board to boot. The BIOS is also even more hard headed about downgrades than the Rampage IV Extreme so I couldn't test out if the pre-Kaveri BIOSes play better with the Athlon X4 750K. This motherboard is feature heavy and has the hardware to back it up. The BIOS is user friendly, but isn’t intelligent enough to handle RAM properly, and you will need to know how to time RAM manually. You will find yourself using the BIOS jumper way more than you should need to. Stuff won't work for no reason and there is no backup chip. However if you experienced or at least patient, the issues this board has will only be minor set backs and will have saved you a lot of money compared to the Crossblade Ranger. This board is completely overkill for a daily “Gaming PC”, and there are plenty of other good boards out there for cheaper. The BIOS is less than stellar if you want to use it for benching, but this board is good if you want to do LN2 overclocking on a budget.

Monday, March 16, 2015

Fan review: CoolerMaster BladeMaster 2400RPM


The 4-pin fan header is braided black. This is a nice touch to the overall aesthetic.


Testing Setup:
For testing the fans I'm using my fan test bench. For temperature testing I ran IBT and measured temperatures using AMD Overdrive. I did the noise tests in a room with an ambient noise level of 25dB. The fan was tested at first on a mattress, to absord vibrations. The second test was with the fan mounted to a Corsair H100. To measure the noise level of the fan,I used the Sound Meter app on my Gsmart Mika M2, which was placed about 15cm away.

These are the CPU power settings:
Clock = 4.5Ghz
VCC = 1.525 High LLC
VNB = 1.2 Medium LLC

Cooler Master Blade Master 2400
Fan Specs
Dimensions: 120mm x 120mm x 25mm
RPM: 2400
Power Draw: 0.37A @ 12V

Performance (ambient 25-26C°, 100% FAN SPEED):
Noise level (lower is better): 54B
Noise level radiator (lower is better): 55B
CPU thermal margin IBT load (higher is better): 19.25­C°

Tuesday, March 10, 2015

My A88X-PRO has arrived

That's right the test bench is back in business and it's much better than before. So I might just redo the G.skilll ECO kit review.

Also the gold goes pretty well with wood.

One last thing. There is a new fan poll up on the side so please vote on which one I should test. You do not need to sign in or anything to do this. I don't care if you double vote or anything.

BTW I love reviewing good motherboards. wink wink

Sunday, March 8, 2015

ACCPU CEO Q&A

AC CPU is an American startup aiming to make phase change cooling more accessible to the average person. By both making it cheaper and more simple to use than what is currently available. This is the transcript from an interview with the CEO of the company that we had over skype text chat. I'm in no way being paid/sponsored by AC CPU and I'm only doing this out of my own interest in what they have demonstrated on reddit.

Buildzoid: Why don't you start this of with what you already have?

Matt Russell: Have you seen our new video? We just started a promotional campaign on Facebook to get our Kickstarter out into the aether and the video is the main focus. https://www.facebook.com/ACCPUInc

Matt Russell: Also, this is the preview link for the Kickstarter. It has the video too.

Matt Russell: https://www.kickstarter.com/projects/598954186/938010357?token=f3adf510

Buildzoid: The coil is just to demonstrate that it can cool it is not what the final evaporator will be based on right?

Matt Russell: Absolutely. The final coil will look more simply like a copper block. We are researching casting techniques with 3D prints right now and should have something to show in blueprint form within the week.

Matt Russell: That coil is ugly. Nothing you can say about it. But it’s the fastest and most efficient way to test different configurations.

Matt Russell: Kickstarter requires that you prove your idea works before you offer it up in Kickstarter. That’s one of the ways they have really changed in response to the lack of accountability complaints that they were getting. We had to jump through quite a few hoops to get our project approved, essentially proving that it would work before they would allow us to seek funding through them.

Matt Russell: So though it’s an ugly half-solution, it met the purposes of showing that our idea was based on sound engineering and wasn’t nonsense.

Matt Russell: This is a very rough engineering mockup of what our heat sink will resemble in the future, which is what that coil will really be housed within.

Buildzoid: Ok cool. So the noise of the compressor in the video and the fan are also just part of the prototype

Matt Russell: Absolutely. The fan is currently run by a drill, even though it was originally part of an air compressor. For the purposes of quick removal and control of the confessor temperatures for testing, it was simply easier to mount it on a cordless drill. As well, that compressor is much larger than what we will be using in production.

Matt Russell: Between that heat sink housing the evaporator coil, and the compressor, you have the very essence of why our design is vastly advanced.

Buildzoid: Since we're talking about the fan radiator already we might as well get out of the way the fact that the maximum heat transfer of the compressor is 608W can you fit a radiator of that power into a PC with reasonable noise levels.

Matt Russell: The radiator is in two sections. In HVAC they are referred two as the ‘evaporator coil’ and the ‘condenser coil’. One is hot (condensor) and one is cold (evaporator). We are confident that we will be able to house the evaporator coil in our heat sink so that all cooling is done essentially right on top of the CPU. That’s what our Sketchup file will show you. It’s about 10 feet of copper tubing stuffed into a 8cm cube.

Matt Russell:  As for the condenser coil, that radiator is likely to go in a common liquid cooling loop radiator. That is something that we are going to need to narrow down post-Kickstarter since we simply haven’t got a bunch of expensive liquid radiator lying around. With some slight modification of the fill ports on a liquid loop radiator, we should have plenty of surface area to maintain the condenser temp at 100F. As the condenser temp rises, you simply lose cooling load capacity, the system continues to work, and our compressor is measured up to a condenser temp of 140F.

Matt Russell: As the condenser temp hits 140, you are still at a capacity of 482 watts.

Buildzoid: So let me get this straight. Once you get the refrigarant compressed it will be at 37C and get shoved into a water coooling radiator from where it will then go to the cooling coil/evaporator block or am I missunderstanding something?

Matt Russell: Compressor hits around 300 psi, the compressed gas goes to the condenser where it loses some of the heat gained from compression and then turns into a liquid by the end of the condenser coil. From there, it travels to a metering device which in our case is a capillary tube. Because the capillary tube is very very tiny in diameter, only a small amount can go through despite the tremendous pressure behind it. As the liquid refrigerant exits the cap. tube the drastic drop in pressure causes it to boil (which in the case of r134a at 13 psi. makes a temp of -13C. As the refrigerant boils it cools the surrounding metal to the boiling temperature and turns into a gas by the time it returns the compressor.

Matt Russell: When we go down to 1.2 psi in the evap lines, then we can hit -24C.

Buildzoid: So the condenser will be a watercooling radiator right?

Matt Russell: That’s one of the possibilities that we are looking at. If for whatever reason that is not feasible (which we really believe it will be) then we have other options like an automotive radiator which is definitely able to handle these pressures.

Matt Russell: We only are looking at water cooling radiators because they can come in a very large size if we need it, and they can be installed into a normal PC case.

Buildzoid: Ok cool so I didn't misunderstnad anything. With watercooling radiatorsa I know for a fact that a full copper thick 360mm Radiator with 1850RPM fans does about 300W heat dissipation with a delta T of about 5C between the water and the ambient air. Now I'm not 100% sure what that will give you at 37C compared to 22/24C ambient but it should be plenty to take care of most CPUs. Now then is there any chance of using a more powerful refrigarant like R404 or would those not work?

Matt Russell: R134a is a great refrigerant for most users because you can buy it at an auto parts store to refill the system (which shouldn’t happen but with tinkerers it can.) Also it can be purchased in 1 lb. cans. whereas most other refrigerants are purchased in 25 lb. or larger cylinders which (trust me I just bought a 410a cylinder) cost around $130.

Matt Russell: 404, 410a, ammonia, they would all work relatively the same (with different pressure/temperature requirements) but for us it’s more an issue of ease of use for the end user. Specifically, we are looking at the user who doesn’t want to pay for the whole complete system as he already has the radiator, or other parts and just wants to add our compressor. It would be a huge cost increase for that builder if we used 410a, because even though it would be a better refrigerant in terms of cooling capacity, it would be more dangerous because of its higher pressures, and more expensive because it is sold in larger containers.

Buildzoid: But people with access to better refrigerants could use them if they wanted to right?

Matt Russell: Yes. As long as the vacated the system of the POE oil that 410a and 134a use and make sure that they replace it. A lot of systems use mineral oil instead, or a proprietary oil blend. If they don’t properly replace the oil, the compressor will destroy itself just like any other machine.

Matt Russell: One thing we will have to keep our eye on is the proposed phaseout of 134a in the EU by 2017. The replacement they are looking at is Carbon Dioxide and we will have to look at testing there. However, I doubt the compressor will be able to handle the ridiculous pressure that Carbon Dioxide requires to function as a refrigerant.

Matt Russell: It is worth noting that 404a, 134a, and 410a have all been tested in the compressor by the manufacturer with great results.

Buildzoid: Ok well that's some good news for the really hardcore crowd. This is now the longest post on my blog ever so lets wrap this up. What is the minimum temperature that a 300W load could get to using your cooler.

Matt Russell: 4C.

Matt Russell: But that’s what it will maintain, not the minimum possible.

Matt Russell: If you are in a cooler room than testing conditions for example, you will go lower.

Matt Russell: If we look into a larger compressor which the manufacturer also offers, we would be able to hit -1C with the same conditions.

Buildzoid: That's very impressive for something so small and and basically means Haswell users could run 1.5V through their chips all day every day. Now then what will the pricing and buisness model of AC CPU be.

Matt Russell: At this point I can give you a range of possibility which hinges on how much we can make the heat sink and purchase the compressor for.

Matt Russell: The range is looking like between $499 - $699 very much depending on research in the Kickstarter phase. We simply can’t fund the project on our own anymore, and in order to bring this to the community we need funding. My wife is going to kill me if I put any more of my own money into this. We have probably spent $2,000 of our own money bringing it this far, and we are looking of at least another $2,500 to go on into testing of components to give a better price range.

Matt Russell: The business plan is this. We will sell plans to do everything yourself for $20 including part recommendations, how to take apart a window AC unit, etc.
On our site, we will also sell the ‘lego kit’ assembly method so that users can create their own custom system without buying the many parts (pipe flaring kit, copper tubing, etc) and pieces of equipment to make their own. We are only looking for a small markup in order to cover our costs and labor.
We will release all of our concepts so that if someone wants to create this system on their own without paying $20 for plans, they can do the same thing.
And we will offer support to everyone. We are here for the community, because we are a part of the community. I overclock and build PCs. So does my partner Dave. Between us we have put together 4 PCs this year, and it’s March. I can not wait until someone takes our system up to HWBOT and wins the rookie challenge. It’s going to be awesome to contribute to the community and change it for the better.

Buildzoid: Sounds good to me. It's a little beyond the cost of high end CPU watercooling loops so how long can one expect the compressor to last?

Matt Russell: My manufacturer sells compressors to the US military which have been in continuous use in MRAP vehicles in Afghanistan for over 5 years. They show no signs of failing. We chose a compressor and system with as few moving parts as possible. Seriously, outside of the compressor there are no moving parts. At all. Nothing to break.

Matt Russell: Also, if you spill liquid in your CPU, you are in a bad way. Refrigerant will boil away and leave the system much much faster to do less damage.

Buildzoid: From what google gave me R134a is not conductive so if you do spill it no damage will happen beyond any condesation it might cause. Well I think this is a good place to end so goodbye and I hope this works out for you.

Matt Russell: Thanks a lot.
Wednesday, March 4, 2015

10K VIEWS!

Here's some teasers of what's coming soon.

R7 260X Vmem mod completed


1600 7-8-7-24 1.6V 4x2GB RipjawsX review


And a review of the fan that won the poll

Sunday, March 1, 2015

G.skill ECO 2x2GB 1333 7-7-7-21 Review/ Why the Asrock A85X extreme 6 is a TERRIBLE motherboard

 I finally figured out how to review these and got my review system fully setup so here goes.

Methodology of testing.
For the frequency part of the testing I test to see how high the kits can clock a certain set of timings for different voltages. This set of timings will be decided after I get a little time to play with the kit and so it will be different for every kit depending on how it does in pre-testing. Once those the timings to test are decided I will test the kit at the following voltages:
1.35V 1.5V 1.65V 1.7V 1.75V 1.8V 1.85V
The testing of the kit will be me raising the clock of the kit as high it will go while capable of running SuperPi 4M on my install of windows XP without crashing or erroring.

Note: I had to swap boards between the 7-9-8-24 and the 8-10-9-27 tests because my F2A88X-D3H died after did something stupid. So the rest of the review was tested using the Asrock A85X Extreme 6 and it has a bout 25mv of overshoot on the RAM VRM so when I list 1.65V for the higher timing test it actually means 1.675V  and 1.35V is actually 1.375V. The Gigabyte on the other hand under shot so if the results going from 7-9-8-24 to 8-10-9-27 look weird that's why. I will this stuff in later reviews. Also the A85X Extreme 6 is absolutely awful with RAM. I couldn't get the 21.33 multiplier to run and certain BLCKs wouldn't run any other multiplier than 13.33. It also automatically changes the Vcore and NB voltages when you change RAM frequencies which explains how it killed my 6800K it probably fed the NB 1.5V when I was trying to boot 2600mhz. Basically this board deserves to get punched. It's also why this review is unfinished. If anyone is wondering I was using the LN2 BIOS for the board. I wanted to test way more timings however there is no point in that when the board is incapable of producing certain RAM frequencies.

Results
Frequency


BTW RAM reviews take really really long to do. Especially when you don't have an SSD to boot from.